
Saturday, February 23, 2013
Silk Top
Friday, February 22, 2013
Sherlock Holmes Cape

When I finished this cape it reminded me of Sherlock Holmes for some reason. I think is it the plaid fabric I used to make it. Even though I don't think pink and black were colors he would have worn. This pattern is out of print McCall's 5764. A very easy to sew pattern. The most challenging part of sewing this cape was trying to match the plaids. You must do the plaid matching at the cutting stage.
I am close to matching on most of the cape. Well it is close enough for me. I am happy with the results and I even found four black vintage buttons in my stash to use on the front closing. This is one of the many patterns I picked up at the auction. I love it when I find a few patterns that I want to make in the box of patterns from the auction.

Wednesday, February 20, 2013
Vintage Wool Coat


The fabric I used is from JoAnn Fabrics clearance section. The outer fabric is a nice coat weight wool. The lining is a polyester satin brown dots. I had the buttons and the zipper in my stash. The zipper needed to be shortened from 12" down to 9". Since it was a zipper with metal teeth it was easy to shorten. I just used pliers to pull the stops off and pull the teeth out for about an inch of the tape. Then I pried the stops open enough so I could get the back over the zipper tape and press them back tightly in place.
I am very happy with this coat I have worn it for the last few days since I finished it. And I have gotten several compliments on it. I love being able to use one of my vintage patterns.
Monday, February 18, 2013
Farmall Tractor Shirt

I was excited to get to make something for my man. He like to restore antique tractors and his favorites are Farmall Tractors. So when I saw this tractor fabric at JoAnn Fabrics I bought some not really knowing what I was going to make with it. When he saw it he thought it would make a nice shirt. He could wear it to his tractor club meetings. I was a bit skeptical about how this rather large print would look in a shirt but I went ahead and sewed it up. I think it turned out nice and my man likes it. It fits him well too.


Thursday, February 14, 2013
Gossip Bench

Tuesday, February 12, 2013
Linen Pants


Simplicity has a line of patterns called Amazing Fit. They are really nice at helping you get the perfect fit. I have used three of these patterns all for pants (I'm not sure if the make these in other garments). This is the first time I tried this pattern 2526. The pattern shows how to take detailed measurements and how to alter your pattern to get just the right fit. It also tells you how a pair of pants should fit you. Only one pair of pants is included in the pattern but you can chose your figure type, slim, average or curvy. I picked average because even though I am on the heavy side I am not really curvy because I have a thick waist. The waistband is the same for all body types. The hips and thighs are the pattern pieces that are different for each body type.
The other nice feature about these patterns is that in several places the seam allowances are one inch instead of the usual 5/8". This gives you room for adjusting and also makes a nice seam look. The side seams, the center back seam, and the back inner thigh seam have one inch allowances. The pattern tells you when to try on the pants before finishing to tweak the fit if needed. I always do this anyways. But I think this would be really helpful to a beginner. It would be nice to have a friend help you with these fitting stages. It is hard to fit yourself.

I think the fit is right on except for the length. I need to shorten them some more. As usual I made them to long even with the highest shoes I am ever going to wear with them. I didn't have a friend to help me with the fittings so I was a bit off. But I usually have to hem my ready to wear pants so it is no big deal to shorten the a bit more. The only change I made to the Pattern was that I added a lining. I thought a lining was necessary because the linen fabric tends to stretch as you are wearing it. A lining will help the pants keep their neat appearance and also keep them from wearing out to soon. I think I am going to like these pants and I will probably use this pattern again for a nice basic pair of pants.
Sunday, February 10, 2013
Church Pew Project

I got this pew several years ago from the church I attend. This one was from the choir loft that they removed. The rest of the church still has these pews. I bought mine for $25. I think that was a great deal. You can't really tell from these photos but the pew only has one arm-leg side. The other side was attached to the wall in the church. That was a problem because I don't have the wood working skills to make another side to match. So the pew sat in my basement for a long time. I kept trying to figure out a way I could fix it without ruining it. I never did.

My church is over 150 years old. I am not sure if the pews are that old but I am pretty sure they are close to that old. The seat is quite narrow and a bit uncomfortable but I have gotten used to them at church. Maybe 18 years ago we got cushions for the pews at church and that made them slightly more comfortable. I think I am going to make a cushion for my pew too. I have a vintage salt bag that I think I am going to use. It reminds me of the Bible verse from Matthew.
- Matthew 5:13
[ Salt and Light ] “You are the salt of the earth. But if the salt loses its saltiness, how can it be made salty again? It is no longer good for anything, except to be thrown out and trampled underfoot.
- I think it will finish my pew off nicely. I love it just the way it is too.
Friday, February 8, 2013
Ric-Rac Skirt


This is a quick and easy skirt pattern with three cute style embellishing options. Except for cutting out the fabric the skirt only took about an hour and a half to sew. I pretty much followed the pattern for view B. The pattern suggested folding the ric-rac trim at the hem in half for a scalloped edge. I didn't really like the look when I tried it so I just left it flat so only one edge of the trim points extend beyond the hem. The waistband on the pattern called for twill tape facing. I wanted to use what I had on hand so I used a strip of the skirt fabric for the straight facing. The fabric I used was a woven fabric with a lot of stretch in the crosswise grain. But interestingly it had no stretch in the lengthwise grain. So I was able to use the side with no stretch in the waistband and keep the stretch in the skirt where I could use a bit of give. I like this skirt and I may make view A with the circle pocket if I can find some fabric in my stash to use.
Thursday, February 7, 2013
Some more tea towels

A New Dress Coat

I made myself a new coat and I love the way it turned out. I used Butterick 5515 a See & Sew pattern. It is a lined coat in two lengths and two different sleeve styles. I made view B with the straight sleeves and the mid knee length. It also has side seam pockets.


The coat has only one button on the front and a snap on the inside to hold the flap level. The pattern envelope says "Yes it's Easy" and yes it was easy. The princess seams make for a nice fit and it is pretty straight forward sewing. I mostly followed the pattern except for the hand sewing the pattern suggests. The pattern called for hand sewing the sleeve lining in place at the cuff and hand sewing the lining in place at the hem edge too. I did all that by machine except for a small area in the center back hem that I needed an opening for turning the coat right side out. And I hand sewed the button and the snap on. The coat also has shoulder pads which the pattern called for hand sewing in place. I sewed these in place by machine too. I am a tailor for my job and over the years I have learned many shortcuts in construction by examining the clothes I am altering. Most ready to wear has very little hand sewing. I am not against hand sewing I even find it very relaxing at times. But machine sewing is so much faster, so if I can make it look nice using my machine I will. I love my new coat and plan to wear it often.
After wearing my new coat I decided to make a few changes to it. First thing was I didn't like where the inside snap was placed. It was on the lining and I had to catch some of the outside coat fabric to keep it secure and from tearing the lining. But that made the coat pucker on the front while wearing it. So I moved the snap so that it was just at the edge of the facing and I added another snap about 2" below the first one. This looks much better.
The second thing that was bugging me was that the side seam pockets would not lie flat. The coat was not to tight which would be a reason for the gaping pockets. The pockets needed to be anchored to keep them from drooping down and causing them to gap. To fix this I used some bar tacks at the top and bottom of the pocket edge. And I also used a chain thread tack to hold the inside of the pocket to the edge of the front seam. This solved the problem and the pockets look great.
The third thing was I felt the shoulders where a bit to broad, they just felt to big. So I reduced the shoulders by about 3/4". Now I like my coat even better. Now it is just right.
Wednesday, February 6, 2013
Days of The Week Hand Towels

Tuesday, February 5, 2013
Tee Shirt


Sunday, February 3, 2013
Pleated Jacket


The fabric had such a loose weave that I had to do some extra stitching to keep everything from raveling apart. This is an unlined jacket so I used mock french seams to enclose the seams on the inside. That made the seams stronger and will prevent raveling and also gives a nice finished appearance to the inside. Although you can hardly see it I used one of my tacking stitches on my Bernina 200E right about each pleat. The stitch is an arrow tack stitch. One royal blue button and a buttonhole finish the jacket. An easy jacket to make and a nice jacket to wear.
Saturday, February 2, 2013
A New Top


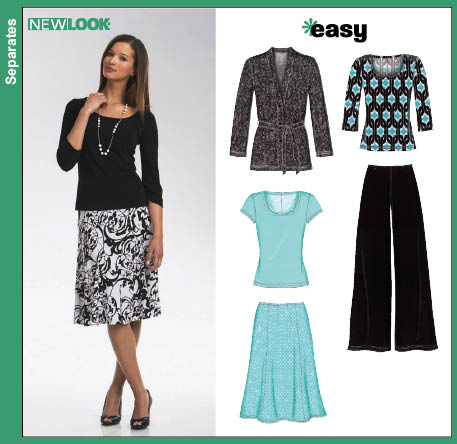
One of my latest projects was this silky top from Butterick 5493. I need to have plenty of tank tops to wear to work under my jacket, I like this top for the most part. I need to work on my narrow top stitched hems though. Some parts of the hem on the front drape I am not so happy with. It is hard to get roll on the very curved piece, especially on this very lightweight slippery fabric. I am thinking about taking it out and redoing it but I am not so sure I can make it look much better. I will probably just wear it as is. I still need to hem this top. I may try this top again in a less slippery fabric.
Friday, February 1, 2013
Brocade Jacket

I bought this fabric about three years ago, I finally got around to making something out of it. I love this brocade fabric. It is reversible one side has grey background with royal blue flowers and the other side is reverse of that. I used the grey background on the top part of my jacket with the blue background on the pleated skirt and pleated cuffs. The difference is very subtle but nice.
 I love the style of this jacket. I like the longer length and it fits me very well. I used Simplicity 3523. It is a Sew Stylish pattern from the publishers of Threads. There is also a shorter style of the jacket in the envelope, as well as a dress, top and pair of pants. I may try the top out. The dress I am not so sure about even though it is just a longer version of the top it just doesn't look all that flattering. The pant are the pretty generic pants that seem to be included in every pattern with a wardrobe look. I do plan to make some pants to wear with my jacket I just will not be using this pattern.
This pattern calls for using large snaps as a closing with buttons sewn on top for a finished look. I opted for the same finish since it uses large buttons. I used some of my vintage buttons from my stash. They are black buttons with a carved star burst design on the surface. I think the buttons finish the jacket off nicely.
http://images.patternreview.com/sewing/patterns/simplicity/3523/3523.jpg
Subscribe to:
Posts (Atom)


