I have had this coat idea in my head for quite some time. I finally made it into a reality. And I love the way it turned out. I am not sure what the fabric content is but it feels like some kind of silk. It was a gift from a friend who worked in a drapery workroom. I love using home dec fabrics for clothing. They usually have a heavier feel to them and I think home dec fabrics are perfect for jackets. While looking through my stash of vintage doilies I came across this crocheted one with pink trim. When I put it next to this fabric I knew they were meant to be together.
I wanted the lace to be an accent around the waist as well as the collar. While the doily was pretty large I still had to plan carefully to use the doily to the best advantage. One part of the doily was to damaged to use so I had to work around that part. I picked The Catherine Coat pattern because I liked the separate skirt with the slightly gathered bodice. And the large collar would be good to showcase the doily as the collar. The doily was just large enough to fit the skirt at the waist of the jacket. I had to do at bit of adjusting to get the rest of the doily to fit around the collar. For the buttons I stacked two buttons together a vintage ecru shell button on the bottom with a smaller pink button on top. I love the results and the fit of this jacket.
I have used this pattern before but it has a completely different look. The pattern has several suggestions for different looks even a robe version. It is an unlined coat but if you used a heavy wool or fleece fabric it could be an outerwear coat as well. A good pattern to be creative with.
Showing posts with label vintage. Show all posts
Thursday, March 28, 2013
Thursday, February 14, 2013
Gossip Bench
We got this gossip bench this past summer at The Auction. We paid $9.00 for it. It was sitting outside on a hot summer day and by the time it came up for bid it had rained and several people had been sitting on it. Several of which were a bit to large for such a small chair. So consequently the chair had suffered some damage. The legs had bowed out and the top had warped a bit. Also the trim that runs along the bottom of the table had peeled and separated. That part had to be remade. It had a vinyl covered plywood seat that had pretty much disintegrated. But we brought it home and my man glued everything back in place and made a new seat and trim. Then he painted it. And together we covered the seat with this green needlepoint piece we got at the auction. We didn't pay anything for this as someone else bought it in a lot of stuff and they didn't want it. I picked it up and brought it home knowing that I would find a use for it. I think it turned out great. My cat likes to curl up on it. I had to cover the seat up with a blanket because my cat was starting to tear up the needlepoint. I can uncover it when someone comes over because my cat will be to scared to come out then.
Wednesday, January 30, 2013
Wool Dress
I used Butterick See & Sew 5168 for my two piece wool dress. The pattern is out of print but I have had it in my stash for quite some time. It does have a vintage look to it but I have not had it that long. This style was very quick and easy to make. A shift style dress and a swing style jacket with raglan sleeves.
I used a charcoal grey lightweight wool for my outfit. I added some vintage lace trim to the hemline of the jacket as well as the dress. I think that kept this rather boring grey from being to frumpy. And since the fabric was a bit sheer looking I decided to add a lining to the dress because I didn't want to wear a slip with it. Also a lining helps to keep the wool from being itchy against the skin. I didn't put a lining in the jacket, with it's swing style a lining was just not needed.
I looked through my stash of vintage buttons and had many that I was considering and ended up with these fairly plain cream colored buttons. I had some lacy looking buttons that I thought would look good but they seemed to fragile. My other options either I didn't have enough of them or they were just a bit to small or to large or just a bit to white to go with the ecru vintage lace. I have so many buttons I didn't want to go out and buy some just for this jacket.
I tried wearing the jacket with pants and it was only OK. The jacket really needs to be about 2 inches longer to look right with pants. But I wanted to wear it to work and I don't like wearing dresses to work. I think I need to take in the sides of the dress a little but other than that I like how everything fits. The shift dress is a good basic dress pattern the goes together fast so I may use that pattern again. I like the jacket but I probably will not make another one. I have several other jacket patterns in my stash I want to try. All in all this is a good project that I am happy with the results.
Friday, August 31, 2012
Vintage Apron
I had about a yard and a half of fabric leftover from the tie dyed bridesmaid dress and I was just dying to make something else with it. I thought an apron for the bride would be just the thing. After all I knew she would like it because she picked out the fabric.
I wanted to try one of my latest finds from the auction; this 1955 apron pattern. Aren't they all so cute. Each one only uses one yard of fabric even 35" or 36" fabric which was common in the 50's. My fabric was 45" and tie dyed which makes this project span a few decades. For some reason that makes me smile.
The apron itself was not an easy project as you would think an apron would be. The bias binding around the pockets and the top edge gave me fits. I am not that happy with the way it turned out but hey it is just an apron so all is good. The pattern had some tricky design details that I had to redo a few times. The picture looks like a simple design but the gathers at the side and the dart and the contrast waistband were more complicated than they appear. But I think it turned out nice overall. It is a good thing the person I made it for is quite small because this apron is tiny. The pattern claims one size but people must have all been tiny in the 50's or only tiny people wore aprons. That's why I modeled it on my mannequin. I would like to try the other two aprons in the pattern maybe I can figure out a way to enlarge them a bit as I don't have that tiny of a waist. Or I could just wait for Simplicity to reprint the pattern for different sizes.
Basket Lid Monogram
A few weeks ago I attended a county fair. There were all kinds of businesses having free raffles and giving away things like pencils and pens and note pads and such. Well this farm store was having a contest that I thought would be fun to try. They gave away a basket lid like this. The rules were to decorate it or find a unique use for it and bring it back to the store by Sept. 1. All the entries will be judged at the store and there will be a first, second and third place. First place = $75 gift card Second place $50 gift card Third place $25 gift card.
My entry was turned in today. I decided to use some of my buttons to create a monogram. I enlarged a letter and printed it out for my pattern. Then I just sewed the buttons on a piece of silk to fill it in completely. I used some of my crocheted lace to give it a little more interest. I cut a circle of foam core board to fit into the lid and I used three layers of batting to pad it out some. Since the lid isn't perfectly round there were some spots where gaps appeared. To make it look more finished and less like a basket lid I hot glued some ruffled eyelet around the edge. And to finish it and fill in any more gaps I twisted a piece of this loose weave tan fabric over the eyelet and hot glued it in place. I think it turned out pretty and I have been wanting to make a button monogram for a while now. I wanted to tea dye the eyelet because it seemed a bit bright for the rest of more toned down vintage lace and buttons. I didn't have time to do that and because this bright newer lace is at the back it works okay. I tried some vintage lace that I had but that needed to have some starch to make it stand out and I didn't have any starch either. This was definitely a project of use what you have. Who knows maybe I will win a gift card. I will let you know.
Thursday, May 17, 2012
1972 OUTFIT
I found this pattern in a huge stash of sewing supplies I won at the auction for $2.00. I was intrigued because this pattern only has three pattern pieces for the whole look. The top is only one pattern piece with only shoulder seams and a seam down the back. I knew that had to be the easiest top ever to sew.
The pant-skirt as the pattern envelope calls them only has two pieces the main skirt piece and the waistband. So even though I was sceptical about the style I wanted to try them out too. I think they may be to old fashioned. I am not sure about them because even after making them and trying them on I kind of like them. Looks more like a skirt than pants so maybe I could wear them in public.
The top on the other hand I will definitely get some use out of. This will be perfect to wear to work. It is hot in the back room were I work but I must wear a jacket when I go out on the floor to fit people so I always wear something sleeveless under my jacket. I do plan on making this top again.
I think the original owner of this pattern had made the top many times too. But had never made the pant-skirt because those pieces were uncut. I had to make the pattern a bit larger because it wasn't in my size. I used a cut and spread method and added some extra paper to what would have been the side seams. The pattern didn't actually have side seams but large darts to give shape to the sides. I also had to do a bit of repair to the darts on the pattern because it had been used some much. They were perforated from a tracing wheel and tracing paper to the point that they were almost cut out completely. So I glued the piece to another paper with spray adhesive. I may trace it onto a piece of lightweight interfacing at some point. I wanted to see how it fit before I did anything else.
Aside from enlarging the size I did make the top about three inches longer. You can't tell the length because I have it tucked in the picture because I wanted you to be able to see the skirt better. I hits me about hip length. I made the skirt a inch and a half longer because the picture on the envelope looked quite short to me. I can always make it shorter if I want. But making things longer is not as easy to do.
The top is an easy make again project. It would have been even quicker and easier if I hadn't used the ruffled fabric. The ruffled fabric can be a bit tricky making sure all the ruffles are going in the right direction. Next time i may try it in a plain fabric and add some embellishments. This top is simple and just asking to be embellished. The pattern even shows an apple applique or a ribbon bow. I don't think I will be using the apple idea though. And I probably will not make the pants-skirt again even though it fit well and was super easy.
Wednesday, April 25, 2012
9 Square Dishtowels
My latest small sewing project was these embellished dishtowels. I wanted a quick creative project that didn't take a lot of brain power.
These didn't take long to make and I had everything on hand. I had a package of waffle weave dishtowels just waiting to be embellished. And somewhere in my stash I came across a box of vintage fabric squares. A few were already sewn into 9 patch blocks. I simply sewed the patches on my towels on point with my handy blanket stitch on my sewing machine. Quick and easy. Cute too! http://www.myrepurposedlife.net
Thursday, March 29, 2012
Hanky Curtains
Wednesday, March 28, 2012
Knitted Tea Towel
I like knitting simple useful projects like this tea towel. It is something I can finish fast and knit without having to think about it much. I got my idea for this from Page's Soft Cotton Knit Dishtowels . Her towels are much smaller than I wanted but I got the basic idea. I found a huge bag of cotton yarn for five dollars at my local Goodwill Store. It is South Maid Cotton 8. Most of it is white or ecru and a few peach and periwinkle skeins too. It is finer yarn than Page's towels used so I adapted the pattern to fit what I had. I used size 5 knitting needles and I cast on 70 stitches. My towel ended up about 14 inches by 18 inches. 
I picked up these three vintage dishtowels a few weeks ago at the auction. They were among three boxes of household linens that I won for only $4.00. They are in really nice condition one has several stains but I may try a more aggressive washing to see if I can get them out. Or I may just use it as is. I patterned my knitted dishtowel after these. I have been having so much fun going to the auction and coming home with my new old goodies. I already completed another project with some other things from this buy. I will show this soon.
Thursday, October 27, 2011
Vintage Patterns
Maybe I will try making one of those robes. I think that would be cute and useful. And my daughter would not be ashamed to be seen with me because I could only wear it around the house. I think the vest and skirt pattern may be cute in the right fabrics. I will have to think on that a bit. Anyways I am glad I won something and it is fun seeing these patterns again. I am beginning to get quite a collection of vintage patterns, many much older than these. They are fun to have and fun to look at.
Thursday, September 1, 2011
Vintage Potholders With Pattern
I picked up this vintage crochet book from Out Of The Ashes. She sells all kinds of vintage sewing pattern and a few vintage knitting and crochet books. Mine is The Magic Of Crochet (Gifts). It is copyright 1941 by the Spool Cotton Company. The price was 10 cents originally and it looks like it was resold at some point for 99 cents. I paid $4.00 for it and I thought that was a bargain. It has all kinds of cute accessories for the home and some fashion items too. There are several things I want to make. The instructions are easy to follow but you must convert the thread and needle size to a modern equivalent. This is not critical with things like place mats or pot holders as they don't need to fit anything they just need to be close. There are no gauges in the book so I just tried to find a thread that worked with the size needle suggested. Most of the patterns use a very tiny needle and thread size.
The pattern I tried first was these potholders called Ship Shape in the book. I had everything I needed around the house. I even had some tiny steel crochet hooks. I ha
d just bought a set of vintage steel crochet hooks in a little plastic case at a flea market. This pattern used one of the medium sized hooks in the set. So I thought it was doable. I even found a couple of bone rings in my stash. I think these probably came from my grandmother's stash. I don't really think they are bone but some sort of plastic. They are quite old though. The thread was leftover from another project and it is new crochet thread. I like these a lot. They turned out bigger than I thought they would. Most of the vintage potholder patterns I have tried are a bit to small for my taste. I don't know if woman had tiny hands in the 40's or they were just trying to conserve on thread. They are a bit thin for a pot holder too but I think they would work for a stove top pot handle or a microwave dish. If nothing else they are cute decorations.
I think the copyright has expired by now so I am going to share the pattern. The pattern is for six potholders three in each color combination. I only made two of them.
Materials: J&P Coats Knit-Cro-Sheen 1 ball white or ecru (referred to in directions as "light color") and 2 balls of dark color.
Milward's Steel Crochet Hook No. 7 and 6 bone rings.
This amount is sufficient for entire set of six potholders.
With light color, work sc closely over ring. Join with a sl st to 1st sc made. 1st rnd: Ch 3 (to count as 1st dc), dc in front loop of 6 sc, ch 3, dc in front loop of next 6 sc. Turn, and working in remaining loop of same sc's, make dc in next 6 sc ch 3 dc in 5 sc. Join with sl st to top of first ch 3 made.
2nd Rnd: Ch 3 (dc in each dc across to ch 3 sp make 2 dc ch 3 and 2 dc) twice; dc in each remaining dc. Join.
Repeat last row 15 more times. Fasten off. Attach dark color and repeat 2nd row 2 more times. Fasten off. Attach light color and work 2nd row once again. Working through both thicknesses ( picking up only the center loops), make sc in each stitch and 4 sc over ch across, ch 5, turn, and make edging as follows: * Ch 4, 3 tr in base of ch 4, skip 3 sc, sc in next sc repeat from* across. Fasten off.
Make 2 more pot holders same as this. Make 3 more pot holders same as this only reversing colors.

The pattern I tried first was these potholders called Ship Shape in the book. I had everything I needed around the house. I even had some tiny steel crochet hooks. I ha
I think the copyright has expired by now so I am going to share the pattern. The pattern is for six potholders three in each color combination. I only made two of them.
Materials: J&P Coats Knit-Cro-Sheen 1 ball white or ecru (referred to in directions as "light color") and 2 balls of dark color.
Milward's Steel Crochet Hook No. 7 and 6 bone rings.
This amount is sufficient for entire set of six potholders.
With light color, work sc closely over ring. Join with a sl st to 1st sc made. 1st rnd: Ch 3 (to count as 1st dc), dc in front loop of 6 sc, ch 3, dc in front loop of next 6 sc. Turn, and working in remaining loop of same sc's, make dc in next 6 sc ch 3 dc in 5 sc. Join with sl st to top of first ch 3 made.
2nd Rnd: Ch 3 (dc in each dc across to ch 3 sp make 2 dc ch 3 and 2 dc) twice; dc in each remaining dc. Join.
Repeat last row 15 more times. Fasten off. Attach dark color and repeat 2nd row 2 more times. Fasten off. Attach light color and work 2nd row once again. Working through both thicknesses ( picking up only the center loops), make sc in each stitch and 4 sc over ch across, ch 5, turn, and make edging as follows: * Ch 4, 3 tr in base of ch 4, skip 3 sc, sc in next sc repeat from* across. Fasten off.
Make 2 more pot holders same as this. Make 3 more pot holders same as this only reversing colors.
Monday, August 22, 2011
Vintage Sewing Books
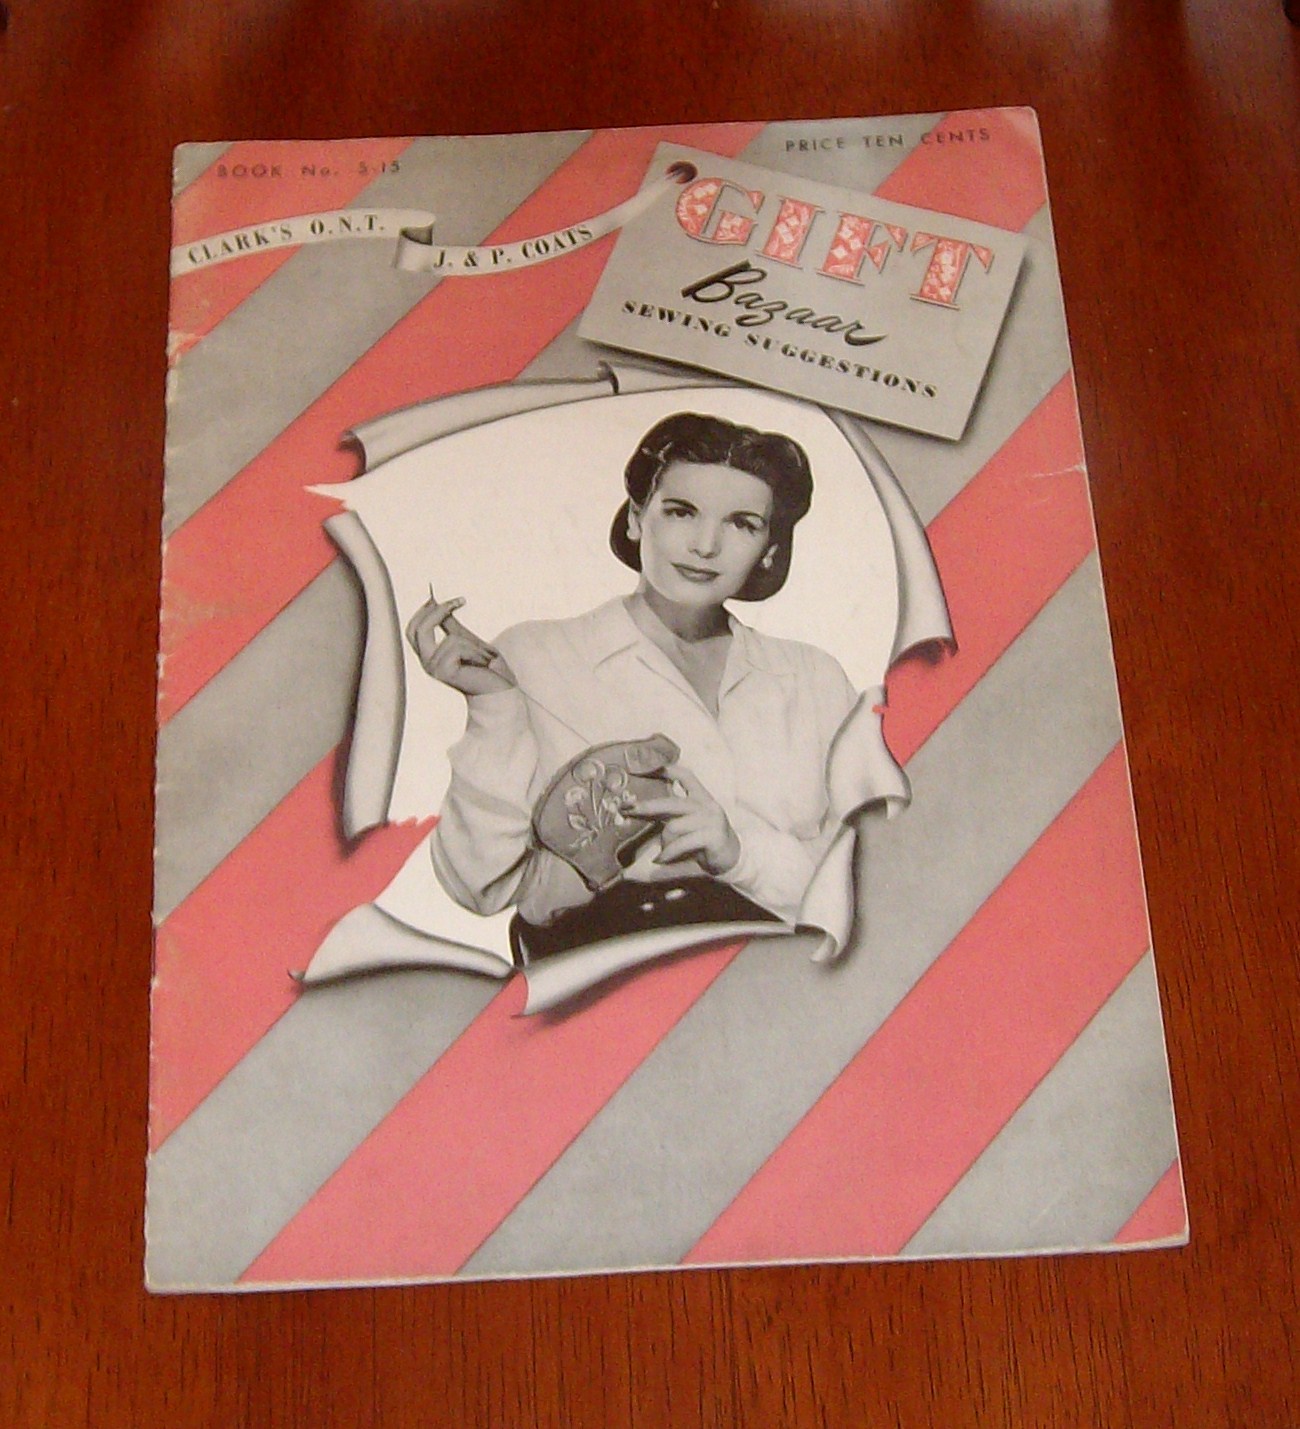
I love collecting vintage sewing books. I recently picked up two vintage sewing books. Gifts You Can Sew is from 1942 and Gift Bazaar Sewing Suggestions is from 1944.
Gifts You Can Sew has dozens of apron projects in it. They all look very straightforward and easy to make. I want to make them all but some of my favorites are the Pot Holder Apron that has button on pot holder pockets. Then there is a Gardening Apron that has a kneeling pad that snaps or buttons on the apron at the knee. I love the Baby Feeding apron to keep baby clean and safe in his high chair. This little apron has sleeves for baby's arms and ties that tie onto the high chair and the bottom of the apron covers the entire tray of the high chair. I think this would be a great idea for using in a restaurant highchair. Another one that was on the page labeled Presents for tots and children is a knitting apron that conveniently folds into a bag. The knitting apron has a gathered pocket on the front to hold your ball of yarn. There are many toys and accessories as well as a section of gifts for men in the service. As far as I can tell these gifts would be useful for anyone man or woman in or out of the service. Here you will find directions for making a scarf. a money belt and a book cover to name a few. Some knitting and crochet projects are scattered throughout the book too.
The Gift Bazaar Book has some sweet aprons in it too. My favorites in this book are the children's toys. There is a lamb, a Scottie dog and an adorable pig. I love the illustration with the gingham pig. he is standing in a pin made with straight pins and there are some trees made with clothespins and thimbles. There are four handbags that look right in style now, They all look very simple to make too. And I must try the cute pig pot holder and the sweet kitten potholder. They would be fun to make and I can always use a cute potholder. I love making up a quick small project. What shall I make first with so many cute ideas? The shaped patterns must be enlarged but I think I can do that on my scanner printer. I think I would make the potholder slightly larger than suggested because I think most vintage potholders are just a bit to small. I need to look through my stash for just the right fabric for some of these projects.
Gifts You Can Sew has dozens of apron projects in it. They all look very straightforward and easy to make. I want to make them all but some of my favorites are the Pot Holder Apron that has button on pot holder pockets. Then there is a Gardening Apron that has a kneeling pad that snaps or buttons on the apron at the knee. I love the Baby Feeding apron to keep baby clean and safe in his high chair. This little apron has sleeves for baby's arms and ties that tie onto the high chair and the bottom of the apron covers the entire tray of the high chair. I think this would be a great idea for using in a restaurant highchair. Another one that was on the page labeled Presents for tots and children is a knitting apron that conveniently folds into a bag. The knitting apron has a gathered pocket on the front to hold your ball of yarn. There are many toys and accessories as well as a section of gifts for men in the service. As far as I can tell these gifts would be useful for anyone man or woman in or out of the service. Here you will find directions for making a scarf. a money belt and a book cover to name a few. Some knitting and crochet projects are scattered throughout the book too.
The Gift Bazaar Book has some sweet aprons in it too. My favorites in this book are the children's toys. There is a lamb, a Scottie dog and an adorable pig. I love the illustration with the gingham pig. he is standing in a pin made with straight pins and there are some trees made with clothespins and thimbles. There are four handbags that look right in style now, They all look very simple to make too. And I must try the cute pig pot holder and the sweet kitten potholder. They would be fun to make and I can always use a cute potholder. I love making up a quick small project. What shall I make first with so many cute ideas? The shaped patterns must be enlarged but I think I can do that on my scanner printer. I think I would make the potholder slightly larger than suggested because I think most vintage potholders are just a bit to small. I need to look through my stash for just the right fabric for some of these projects.
Thursday, July 21, 2011
Damask Jacket
The pattern I used is the Damask Jacket from Barb Originals. I bought this pattern several years ago at the Sewing Expo. For some reason I have never sewed it up before. It is a loose fitting swing jacket. As the name suggest it was designed to be made using a Damask Tablecloth. You can use any fabric that has a nice flow to it. Barb also sold some very lovely linen in her booth at the Expo. My tablecloth had a nice drape to it but I didn't want a white jacket. So I tried my first dying project. I followed the directions on the package of Rit Dye and dyed the fabric in my front loading High Efficiency Washing machine. I think it turned out great. The petal pink color shows off the damask pattern better too. It was quite a large tablecloth s
Since I was using a vintage tablecloth for my fabric I thought this was a perfect place to use a few of my vintage hankies too. I used two of them, one was added to the peplum at the back and the other at the collar and cuffs. I had a tiny piece of hankie left over from my hankie tops. I decided to make it into a flower pin to add to the lapel. that added just the right finishing touch.
The buttons I used are some vintage buttons
border="0" href="http://tatertotsandjello.blogspot.com"
target="_blank">
alt="Join us Saturdays at tatertotsandjello.com for the weekend wrap
up party!" />
Friday, July 1, 2011
Handkerchief Tops
I have acquired quite a collection of vintage hankies. Some belonged to family members a few I picked up at antique shops and several I purchased from online auctions at Shop Goodwill . I love looking at my hankie collection and dreaming up ideas to use them. However I have a very hard time actually cutting into one of my vintage hankies. In fact many of my hankies are still folded in their original form and I can hardly bring myself to unfold them. They have been folded in that shape for many years so it is quite easy to refold them. They are so pretty and unique they should be shown off and used for something pretty.
I picked up a copy of Hankie Style by Amy Barickman for Indygo Junction. This book has several apparel and accessory projects all using hanker chiefs. Some use hankie fabric and new and vintage hankies. I do have several new hankies in my collection too. I thought I would be able to cut into the new ones more easily, but they came in such a cute package and were folded so cleverly that I didn't want to disturb them either. I decided to take the plunge and use a few of my hankies to actually make something.
My book has two full size garment patterns included, a cardigan and a tunic. The cap sleeved tunic looked like the perfect project to try first. It only used one hankie and I needed some light weight tops to wear to work. I had recently purchased this sweet Swiss dot fabric at Hancock Fabrics . It is very lightweight and has a nice vintage look. I went through my hankies to find the right ones to match my pink dot fabric and the pretty pink floral dot fabric.
The Cap Sleeved Tunic was very easy to put together. It only took me about an hour and a half to cut and sew my first top. For the first one I used the pink floral with a rose windowpane hankie. I picked this one first because the hankie had a small hole in one side so I didn't feel so bad about cutting it up. I like the finished top except the neckline is slightly to big in the front. I fixed it by stretching a piece of elastic at the very edge of the neck. This gathered it up slightly causing it to fit more closely to my neck. The next top I altered the pattern to make the neck smaller before cutting the fabric. The second top made with the pink dot fabric fit much better. The hankie I picked out for this top had a large bouquet in one corner and I wanted to highlight that feature. I turned the hankie on the bias and let the point float freely beyond the seam. I like the way this one turned out and I wore it to work today. I will probably make more of these tops because they are so quick and easy and really could be made without a hankie. Next project from this book perhaps a scarf or a T-shirt embellishment.
I joined these link parties!! My Repurposed Life and Amy Lou Who Sew-N-Tell.
Sunday Showcase at Under The Table Dreaming.
Saturday, November 20, 2010
A trio of chickens
My good friend Mary gave me this Crochet Pot Holder book for my birthday. It has a copyright from 1939. And it is just full of adorable pot holders. Each one has very simple instructions. When I spotted the chicken pot holders I knew I had to make some for Mary. She likes to collect whimsical chickens to decorate her kitchen. Maybe that was her motive in gifting me the book. LOL I don't mind as I love vintage crochet books and I plan to make myself some too.
I went through my yarn stash and found some red, yellow and orange Sugar and Cream cotton yarn. Perfect for some chickens. I also needed some felt for the combs and beaks as well as the underside of the chicken body. I had been holding on to this hideous orange wool coat for a while. I knew it would come in handy at some point. I had already felted it by
throwing it into the washing machine in hot water. So now it is a nice heavy felt. I must have used some of it for another project because parts of it had already been used. I just don't remember what project. After adding some turquoise button eyes my chickens were complete. I love things that are practical as well as cute. Next maybe I will try the Three Little Maids pot holders on page 8. They are three multicultural faces with a holder. I am not sure if I feel right about putting a hot pot on a face. But they sure are cute.
I went through my yarn stash and found some red, yellow and orange Sugar and Cream cotton yarn. Perfect for some chickens. I also needed some felt for the combs and beaks as well as the underside of the chicken body. I had been holding on to this hideous orange wool coat for a while. I knew it would come in handy at some point. I had already felted it by
I am sharing at this Link party Sunday Showcase
Monday, July 26, 2010
Quilted Table Runner
I bought this batch of quilt squares last week from Goodwill Online. There were eight of these quilt blocks. I added the blue, pink and yellow sashing strips and made a table runner out of four of them. I added the sashing strips because I didn't really like the yellow at the outside edge of the squares. So I tried the blue, pink and yellow dotted fabric I had in my stash. I thought it had a vintage look to it and it matched the other colors in the blocks. After adding the sashing strips I liked the look of the blocks much better.
The quilt blocks were hand sewn together. A few of them were a bit stretched out in the center but I was able to fix them by taking a few of the seams in just a bit. Since the blocks were already sewn together I decided to do a quick project with them. I had enough to make two table runners one for me and one to give away. So far I have only finished the one for me. It is actually quite long so I may make the next one with only three squares. I didn't want to hand quilt it so I used a quilting stitch on my machine. I used a dark pink embroidery thread to do the stitching because I thought it tied everything together.
I don't do much quilting I think because it always takes longer than I would like it to. I prefer garment sewing. I do enjoy picking out fabric combinations for quilts and seeing how everything looks together. But most quilts seem like they take forever to finish and that is the part I don't like. This is not the best sewing I have done but I like it and I like the vintage feel of it. Maybe the next one will turn out better.
The quilt blocks were hand sewn together. A few of them were a bit stretched out in the center but I was able to fix them by taking a few of the seams in just a bit. Since the blocks were already sewn together I decided to do a quick project with them. I had enough to make two table runners one for me and one to give away. So far I have only finished the one for me. It is actually quite long so I may make the next one with only three squares. I didn't want to hand quilt it so I used a quilting stitch on my machine. I used a dark pink embroidery thread to do the stitching because I thought it tied everything together.
I don't do much quilting I think because it always takes longer than I would like it to. I prefer garment sewing. I do enjoy picking out fabric combinations for quilts and seeing how everything looks together. But most quilts seem like they take forever to finish and that is the part I don't like. This is not the best sewing I have done but I like it and I like the vintage feel of it. Maybe the next one will turn out better.
Subscribe to:
Posts (Atom)