My daughter is a huge cat fanatic. She loves to wear cat themed clothing. I have had this newsprint cat fabric in my stash for a few years. Also the cat comics fabric. We have had the idea to make a skirt with it since she is a Journalism major. I used Simplicity 1917 for the pattern. I made the skirt following the view D exactly as the pattern showed. It was a very easy skirt pattern to sew up. I used her measurements to pick a size and it fit her perfectly without any changes. The skirt is softly pleated and hit her about knee length. She likes it and I am happy that I got to make something for her.
Showing posts with label clothing. Show all posts
Wednesday, April 3, 2013
Monday, April 1, 2013
Spring Linen Jacket
It seems I have been making a lot of jackets lately. This one is McCall's 6516. It is a very draped loose fitting jacket. My fabric is a aqua linen with a rectangle design woven into it. I love the color. I haven't had a chance to wear this jacket yet as it has mostly been to cold here. But I think this will be an easy to wear casual jacket.
Thursday, March 28, 2013
My Doily Coat
I have had this coat idea in my head for quite some time. I finally made it into a reality. And I love the way it turned out. I am not sure what the fabric content is but it feels like some kind of silk. It was a gift from a friend who worked in a drapery workroom. I love using home dec fabrics for clothing. They usually have a heavier feel to them and I think home dec fabrics are perfect for jackets. While looking through my stash of vintage doilies I came across this crocheted one with pink trim. When I put it next to this fabric I knew they were meant to be together.
I wanted the lace to be an accent around the waist as well as the collar. While the doily was pretty large I still had to plan carefully to use the doily to the best advantage. One part of the doily was to damaged to use so I had to work around that part. I picked The Catherine Coat pattern because I liked the separate skirt with the slightly gathered bodice. And the large collar would be good to showcase the doily as the collar. The doily was just large enough to fit the skirt at the waist of the jacket. I had to do at bit of adjusting to get the rest of the doily to fit around the collar. For the buttons I stacked two buttons together a vintage ecru shell button on the bottom with a smaller pink button on top. I love the results and the fit of this jacket.
I have used this pattern before but it has a completely different look. The pattern has several suggestions for different looks even a robe version. It is an unlined coat but if you used a heavy wool or fleece fabric it could be an outerwear coat as well. A good pattern to be creative with.
I wanted the lace to be an accent around the waist as well as the collar. While the doily was pretty large I still had to plan carefully to use the doily to the best advantage. One part of the doily was to damaged to use so I had to work around that part. I picked The Catherine Coat pattern because I liked the separate skirt with the slightly gathered bodice. And the large collar would be good to showcase the doily as the collar. The doily was just large enough to fit the skirt at the waist of the jacket. I had to do at bit of adjusting to get the rest of the doily to fit around the collar. For the buttons I stacked two buttons together a vintage ecru shell button on the bottom with a smaller pink button on top. I love the results and the fit of this jacket.
I have used this pattern before but it has a completely different look. The pattern has several suggestions for different looks even a robe version. It is an unlined coat but if you used a heavy wool or fleece fabric it could be an outerwear coat as well. A good pattern to be creative with.
Monday, March 25, 2013
Aurelia Cardigan
The first thing I did was to use a fabric with more stretch. I used a cotton knit from JoAnn Fabrics. The ruffle contrast fabric is a woven cotton voile as the pattern suggest. I added about a half inch to the width of the sleeves. I like the feel of the sleeves much better. I also added some to the side seams so that the front over laps more. I like this better too. The pattern envelope shows this cardigan being worn with a belt so I thought I would give that look a try. I am not sure if I like this look yet. I think I would be constantly trying to keep the belt in place. There are no carriers for the belt but I may add them in case I do wear this with a belt. I may add a bit of elastic at the center back because I don't like the way the back stands out. The elastic would keep the back in place without the need for the belt. And I could still wear it either way. Overall I do like this cardigan and it was easy to sew.
Saturday, February 23, 2013
Silk Top
Friday, February 22, 2013
Sherlock Holmes Cape
When I finished this cape it reminded me of Sherlock Holmes for some reason. I think is it the plaid fabric I used to make it. Even though I don't think pink and black were colors he would have worn. This pattern is out of print McCall's 5764. A very easy to sew pattern. The most challenging part of sewing this cape was trying to match the plaids. You must do the plaid matching at the cutting stage.
I am close to matching on most of the cape. Well it is close enough for me. I am happy with the results and I even found four black vintage buttons in my stash to use on the front closing. This is one of the many patterns I picked up at the auction. I love it when I find a few patterns that I want to make in the box of patterns from the auction.

Wednesday, February 20, 2013
Vintage Wool Coat
I think this pattern is from the 60's. I couldn't find any date on it but judging from the hair style and the style of the coat I am guessing 60's. I liked the look of this coat and as luck would have it the pattern I had was my size. Most modern patterns have multiple sizes in one envelope. Most vintage patterns have only one size included. This pattern had two length variations, the car coat length and a longer below the knee length. I made the shorter style. It is a fully lined swing style coat. The pattern has only six pattern pieces. The whole sleeve and back section are one large piece. The coat front and the front facing are one piece too. The other four pieces are the pocket, the pocket band, the collar and the hood. The lining uses the same pattern pieces as the coat front and the coat back.
I really had fun sewing this coat up. It had some unique but easy construction methods. It has a loose but comfortable fit. The hood is detachable so you can use the coat without the hood if you want. There is a separating zipper under the collar that hold the hood in place. The zipper is hidden under the collar and you would only see the zipper when the hood was up. The hood also has a drawstring. I liked the way the front slant pockets were made. I thought they would be a bit tricky to make but the were quite simple and they turned out great too.
The fabric I used is from JoAnn Fabrics clearance section. The outer fabric is a nice coat weight wool. The lining is a polyester satin brown dots. I had the buttons and the zipper in my stash. The zipper needed to be shortened from 12" down to 9". Since it was a zipper with metal teeth it was easy to shorten. I just used pliers to pull the stops off and pull the teeth out for about an inch of the tape. Then I pried the stops open enough so I could get the back over the zipper tape and press them back tightly in place.
I am very happy with this coat I have worn it for the last few days since I finished it. And I have gotten several compliments on it. I love being able to use one of my vintage patterns.
http://www.myrepurposedlife.net href="http://www.myrepurposedlife.net" target="_blank">
http://i940.photobucket.com/albums/ad249/MyRepurposedLife/catchascatchcan_1502.gif
" border="0" alt="Photobucket" />
http://thebusybhive.blogspot.com/">
src="http://i1264.photobucket.com/albums/jj483/Barbie_Powell/final_zps65ee0374.jpg" border="0"/>
I really had fun sewing this coat up. It had some unique but easy construction methods. It has a loose but comfortable fit. The hood is detachable so you can use the coat without the hood if you want. There is a separating zipper under the collar that hold the hood in place. The zipper is hidden under the collar and you would only see the zipper when the hood was up. The hood also has a drawstring. I liked the way the front slant pockets were made. I thought they would be a bit tricky to make but the were quite simple and they turned out great too.
The fabric I used is from JoAnn Fabrics clearance section. The outer fabric is a nice coat weight wool. The lining is a polyester satin brown dots. I had the buttons and the zipper in my stash. The zipper needed to be shortened from 12" down to 9". Since it was a zipper with metal teeth it was easy to shorten. I just used pliers to pull the stops off and pull the teeth out for about an inch of the tape. Then I pried the stops open enough so I could get the back over the zipper tape and press them back tightly in place.
I am very happy with this coat I have worn it for the last few days since I finished it. And I have gotten several compliments on it. I love being able to use one of my vintage patterns.
Monday, February 18, 2013
Farmall Tractor Shirt
I was excited to get to make something for my man. He like to restore antique tractors and his favorites are Farmall Tractors. So when I saw this tractor fabric at JoAnn Fabrics I bought some not really knowing what I was going to make with it. When he saw it he thought it would make a nice shirt. He could wear it to his tractor club meetings. I was a bit skeptical about how this rather large print would look in a shirt but I went ahead and sewed it up. I think it turned out nice and my man likes it. It fits him well too.
I used this out of print Simplicity Pattern 8150 I had in my pattern stash. It is a pretty basic shirt pattern and easy to sew too. I also made him a pair of boxer shorts from this pattern but we chose not to post any pictures of those. The shorts are very easy to sew with only one pattern piece. I think the shorts took less than an hour to sew. The shirt may have taken 3 hours to sew I didn't really time myself . But I know it was quick and easy to sew. This is the first time I have used this pattern for the shirt but I have made the shorts before. Several years ago I was trying to use up some of my stash fabric so I made boxer shorts for my two sons. I probably will not make the tie as all the men in my life do not wear ties except on rare occasions.
Tuesday, February 12, 2013
Linen Pants
Simplicity has a line of patterns called Amazing Fit. They are really nice at helping you get the perfect fit. I have used three of these patterns all for pants (I'm not sure if the make these in other garments). This is the first time I tried this pattern 2526. The pattern shows how to take detailed measurements and how to alter your pattern to get just the right fit. It also tells you how a pair of pants should fit you. Only one pair of pants is included in the pattern but you can chose your figure type, slim, average or curvy. I picked average because even though I am on the heavy side I am not really curvy because I have a thick waist. The waistband is the same for all body types. The hips and thighs are the pattern pieces that are different for each body type.
The other nice feature about these patterns is that in several places the seam allowances are one inch instead of the usual 5/8". This gives you room for adjusting and also makes a nice seam look. The side seams, the center back seam, and the back inner thigh seam have one inch allowances. The pattern tells you when to try on the pants before finishing to tweak the fit if needed. I always do this anyways. But I think this would be really helpful to a beginner. It would be nice to have a friend help you with these fitting stages. It is hard to fit yourself.
I think the fit is right on except for the length. I need to shorten them some more. As usual I made them to long even with the highest shoes I am ever going to wear with them. I didn't have a friend to help me with the fittings so I was a bit off. But I usually have to hem my ready to wear pants so it is no big deal to shorten the a bit more. The only change I made to the Pattern was that I added a lining. I thought a lining was necessary because the linen fabric tends to stretch as you are wearing it. A lining will help the pants keep their neat appearance and also keep them from wearing out to soon. I think I am going to like these pants and I will probably use this pattern again for a nice basic pair of pants.
Friday, February 8, 2013
Ric-Rac Skirt
http://images.patternreview.com/sewing/patterns/mccall/6290/6290.jpg
This is a quick and easy skirt pattern with three cute style embellishing options. Except for cutting out the fabric the skirt only took about an hour and a half to sew. I pretty much followed the pattern for view B. The pattern suggested folding the ric-rac trim at the hem in half for a scalloped edge. I didn't really like the look when I tried it so I just left it flat so only one edge of the trim points extend beyond the hem. The waistband on the pattern called for twill tape facing. I wanted to use what I had on hand so I used a strip of the skirt fabric for the straight facing. The fabric I used was a woven fabric with a lot of stretch in the crosswise grain. But interestingly it had no stretch in the lengthwise grain. So I was able to use the side with no stretch in the waistband and keep the stretch in the skirt where I could use a bit of give. I like this skirt and I may make view A with the circle pocket if I can find some fabric in my stash to use.
Thursday, February 7, 2013
A New Dress Coat
I made myself a new coat and I love the way it turned out. I used Butterick 5515 a See & Sew pattern. It is a lined coat in two lengths and two different sleeve styles. I made view B with the straight sleeves and the mid knee length. It also has side seam pockets.
The fit is perfect as far as I am concerned. Some would say the sleeves are to long but that is the way I like my sleeves on a coat. It keeps me warmer to have my sleeves covering my hands.The fabric I used I got about three years ago at The Sewing Expo. I think I need to go back this year as I haven't been in several years. The fabric is a very soft wool and silk blend herringbone weave. It feels lovely. The lining is a lightweight silk print. I thought it went nice with the grey coating. I like using prints for my linings. I think it adds interest to an otherwise boring inside.
The coat has only one button on the front and a snap on the inside to hold the flap level. The pattern envelope says "Yes it's Easy" and yes it was easy. The princess seams make for a nice fit and it is pretty straight forward sewing. I mostly followed the pattern except for the hand sewing the pattern suggests. The pattern called for hand sewing the sleeve lining in place at the cuff and hand sewing the lining in place at the hem edge too. I did all that by machine except for a small area in the center back hem that I needed an opening for turning the coat right side out. And I hand sewed the button and the snap on. The coat also has shoulder pads which the pattern called for hand sewing in place. I sewed these in place by machine too. I am a tailor for my job and over the years I have learned many shortcuts in construction by examining the clothes I am altering. Most ready to wear has very little hand sewing. I am not against hand sewing I even find it very relaxing at times. But machine sewing is so much faster, so if I can make it look nice using my machine I will. I love my new coat and plan to wear it often.
After wearing my new coat I decided to make a few changes to it. First thing was I didn't like where the inside snap was placed. It was on the lining and I had to catch some of the outside coat fabric to keep it secure and from tearing the lining. But that made the coat pucker on the front while wearing it. So I moved the snap so that it was just at the edge of the facing and I added another snap about 2" below the first one. This looks much better.
The second thing that was bugging me was that the side seam pockets would not lie flat. The coat was not to tight which would be a reason for the gaping pockets. The pockets needed to be anchored to keep them from drooping down and causing them to gap. To fix this I used some bar tacks at the top and bottom of the pocket edge. And I also used a chain thread tack to hold the inside of the pocket to the edge of the front seam. This solved the problem and the pockets look great.
The third thing was I felt the shoulders where a bit to broad, they just felt to big. So I reduced the shoulders by about 3/4". Now I like my coat even better. Now it is just right.
Tuesday, February 5, 2013
Tee Shirt
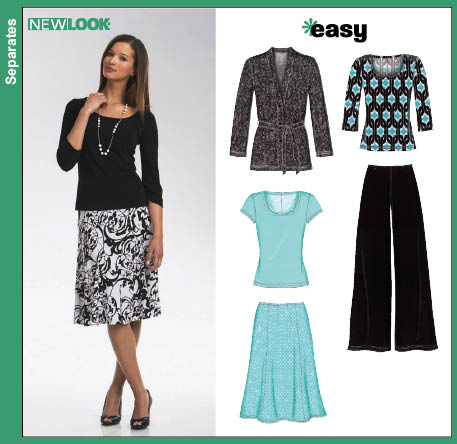
This tee shirt is made from New Look 6735http://images.patternreview.com/sewing/patterns/newlook/6735/6735.jpg
I have sewn this pattern many many times but only the top. It is my favorite plain tee shirt. I love the fit and it is really easy to sew as most basic tee shirts are. I think this is the first time I have made the short sleeved version. I did change the sleeve length slightly because the pattern curved up. My fabric has these cutout parts that I thought would look better with a straight sleeve. The other change I made was to eliminate the center seam down the back. I just put the center back on the fold. The center back seam dose give a closer fit. But my figure doesn't really lend itself to a close fit. The cutout fabric make parts of the shirt sheer but I think it will be nice to wear under a jacket or with a cami under.
Sunday, February 3, 2013
Pleated Jacket
This was a super easy jacket to sew up. I used a silk loose weave with multi colored yarns. There are blues, greens, white, grey and black threads in the fabric. I have had this in my stash for a few years. I think this pattern is out of print. I like the style of this jacket and it does fit me well. It has a swing style with pleats in the front and a large pleat in the center back. It has three quarter length sleeves that fit rather loose. I may make either the dress or the top included on the pattern.
The fabric had such a loose weave that I had to do some extra stitching to keep everything from raveling apart. This is an unlined jacket so I used mock french seams to enclose the seams on the inside. That made the seams stronger and will prevent raveling and also gives a nice finished appearance to the inside. Although you can hardly see it I used one of my tacking stitches on my Bernina 200E right about each pleat. The stitch is an arrow tack stitch. One royal blue button and a buttonhole finish the jacket. An easy jacket to make and a nice jacket to wear.
Saturday, February 2, 2013
A New Top
I got this cute vintage dressform at the auction a few weeks ago. It is adjustable and I love the aqua color. I think it is perfect for dispalying my latest project on.
http://images.patternreview.com/sewing/patterns/butterick/5493/5493.jpg
One of my latest projects was this silky top from Butterick 5493. I need to have plenty of tank tops to wear to work under my jacket, I like this top for the most part. I need to work on my narrow top stitched hems though. Some parts of the hem on the front drape I am not so happy with. It is hard to get roll on the very curved piece, especially on this very lightweight slippery fabric. I am thinking about taking it out and redoing it but I am not so sure I can make it look much better. I will probably just wear it as is. I still need to hem this top. I may try this top again in a less slippery fabric.
http://images.patternreview.com/sewing/patterns/butterick/5493/5493.jpg
One of my latest projects was this silky top from Butterick 5493. I need to have plenty of tank tops to wear to work under my jacket, I like this top for the most part. I need to work on my narrow top stitched hems though. Some parts of the hem on the front drape I am not so happy with. It is hard to get roll on the very curved piece, especially on this very lightweight slippery fabric. I am thinking about taking it out and redoing it but I am not so sure I can make it look much better. I will probably just wear it as is. I still need to hem this top. I may try this top again in a less slippery fabric.
Wednesday, January 30, 2013
Wool Dress
I used Butterick See & Sew 5168 for my two piece wool dress. The pattern is out of print but I have had it in my stash for quite some time. It does have a vintage look to it but I have not had it that long. This style was very quick and easy to make. A shift style dress and a swing style jacket with raglan sleeves.
I used a charcoal grey lightweight wool for my outfit. I added some vintage lace trim to the hemline of the jacket as well as the dress. I think that kept this rather boring grey from being to frumpy. And since the fabric was a bit sheer looking I decided to add a lining to the dress because I didn't want to wear a slip with it. Also a lining helps to keep the wool from being itchy against the skin. I didn't put a lining in the jacket, with it's swing style a lining was just not needed.
I looked through my stash of vintage buttons and had many that I was considering and ended up with these fairly plain cream colored buttons. I had some lacy looking buttons that I thought would look good but they seemed to fragile. My other options either I didn't have enough of them or they were just a bit to small or to large or just a bit to white to go with the ecru vintage lace. I have so many buttons I didn't want to go out and buy some just for this jacket.
I tried wearing the jacket with pants and it was only OK. The jacket really needs to be about 2 inches longer to look right with pants. But I wanted to wear it to work and I don't like wearing dresses to work. I think I need to take in the sides of the dress a little but other than that I like how everything fits. The shift dress is a good basic dress pattern the goes together fast so I may use that pattern again. I like the jacket but I probably will not make another one. I have several other jacket patterns in my stash I want to try. All in all this is a good project that I am happy with the results.
Thursday, May 17, 2012
1972 OUTFIT
I found this pattern in a huge stash of sewing supplies I won at the auction for $2.00. I was intrigued because this pattern only has three pattern pieces for the whole look. The top is only one pattern piece with only shoulder seams and a seam down the back. I knew that had to be the easiest top ever to sew.
The pant-skirt as the pattern envelope calls them only has two pieces the main skirt piece and the waistband. So even though I was sceptical about the style I wanted to try them out too. I think they may be to old fashioned. I am not sure about them because even after making them and trying them on I kind of like them. Looks more like a skirt than pants so maybe I could wear them in public.
The top on the other hand I will definitely get some use out of. This will be perfect to wear to work. It is hot in the back room were I work but I must wear a jacket when I go out on the floor to fit people so I always wear something sleeveless under my jacket. I do plan on making this top again.
I think the original owner of this pattern had made the top many times too. But had never made the pant-skirt because those pieces were uncut. I had to make the pattern a bit larger because it wasn't in my size. I used a cut and spread method and added some extra paper to what would have been the side seams. The pattern didn't actually have side seams but large darts to give shape to the sides. I also had to do a bit of repair to the darts on the pattern because it had been used some much. They were perforated from a tracing wheel and tracing paper to the point that they were almost cut out completely. So I glued the piece to another paper with spray adhesive. I may trace it onto a piece of lightweight interfacing at some point. I wanted to see how it fit before I did anything else.
Aside from enlarging the size I did make the top about three inches longer. You can't tell the length because I have it tucked in the picture because I wanted you to be able to see the skirt better. I hits me about hip length. I made the skirt a inch and a half longer because the picture on the envelope looked quite short to me. I can always make it shorter if I want. But making things longer is not as easy to do.
The top is an easy make again project. It would have been even quicker and easier if I hadn't used the ruffled fabric. The ruffled fabric can be a bit tricky making sure all the ruffles are going in the right direction. Next time i may try it in a plain fabric and add some embellishments. This top is simple and just asking to be embellished. The pattern even shows an apple applique or a ribbon bow. I don't think I will be using the apple idea though. And I probably will not make the pants-skirt again even though it fit well and was super easy.
Thursday, March 15, 2012
Aurelia Cardigan
Subscribe to:
Posts (Atom)